DIY Tablet Repair: A Comprehensive Guide to Flex Cable Replacement
So, you've accidentaly dropped your tablet, and now it's acting like it's auditioning for a role in a horror movie? Don't worry, we've all been there! But fear not, because in this comprehensive guide, we're going to walk you through the mystical world of tablet repair, with a focus on flex cable replacement.Understanding Flex Cables
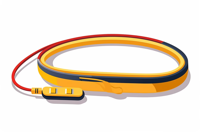
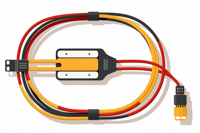
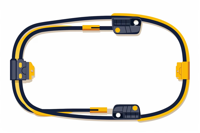
First things first, let's talk about flex cables. No, they're not some sort of magical noodles that you can find in an eccentric wizard's pantry. Flex cables are those delicate, ribbon-like connectors that allow various components of your tablet to communicate with each other. They are responsible for transmitting power, data, and signals, making them an essential part of your tablet's functionality.
Signs of a Damaged Flex Cable
Before we dive into the repair process, let's identify some common signs of a damaged flex cable. Is your tablet suddenly experiencing touch screen issues, display problems, or random reboots? If so, it's possible that a flex cable has gone rogue. Other symptoms may include unresponsive buttons, erratic behavior, or even a complete failure of certain functions. If you're witnessing any of these issues, it's time to roll up your sleeves and get to work!
Tools of the Trade
Now that we've established the importance of flex cables and identified the signs of damage, let's gather our tools. You'll need a few essentials for this DIY adventure:
- Patience: Repairing a tablet requires a calm and collected mindset. Take your time, and don't rush the process.
- Screwdriver Set: Different tablets have different screw types, so ensure you have a compatible set to remove those pesky screws.
- Plastic Pry Tools: These handy tools will help you gently pry open the tablet's casing without causing any damage.
- Tweezers: A good pair of tweezers will be your best friend when it comes to handling delicate flex cables.
- Replacement Flex Cable: Of course, you'll need a new flex cable to replace the damaged one. Make sure it's compatible with your tablet model. Consider using the E/P New LCD Screen Flex Cable for Microsoft Surface Pro 4 or the Original Home Button Flex Cable for iPad Air 1st/ iPad 5.
Step-by-Step Flex Cable Replacement
Now that we have our tools ready, it's time to embark on our repair journey. Remember, if at any point you feel overwhelmed, take a deep breath and remind yourself that you're a fearless DIY warrior!
- Prepare your workspace: Find a clean, well-lit area to work in. A cluttered desk or a dimly lit room is a recipe for disaster. Trust us; you don't want to lose a tiny screw in the abyss of your carpet!
- Power down the tablet: Before we get our hands dirty, make sure your tablet is powered off. Safety first, folks!
- Remove the casing: Using your plastic pry tools, gently remove the casing of your tablet. Take your time and be gentle, as you don't want to crack or damage the casing.
- Identify the damaged flex cable: Now that you have access to the tablet's internals, locate the damaged flex cable. It will typically be connected to the component that's malfunctioning.
- Disconnect the flex cable: Using your tweezers, carefully disconnect the damaged flex cable from its connector. Be gentle, as these cables are fragile!
- Replace the flex cable: Take your shiny new flex cable and connect it to the appropriate connector. Ensure it's securely fastened, but don't use excessive force. Consider using the Charging Port Flex Cable for Samsung Tab S 10.5 or the Replacement Flex Cable Wifi Antenna for Apple iPad 2.
- Reassemble the tablet: Once you've successfully replaced the flex cable, it's time to put everything back together. Reattach the casing, screw in the screws, and make sure everything is snug and secure.
- Power it up: With bated breath, power on your tablet and cross your fingers. Hopefully, the new flex cable has brought your tablet back to life!
When to Seek Professional Help
While this guide aims to empower you to tackle flex cable replacements on your own, there may be instances where seeking professional help is the wiser choice. If you're unsure about your technical skills, or if your tablet is still under warranty, it's best to leave the repair to the experts. Remember, there's no shame in asking for assistance when needed!
Wrapping Up
Congratulations, you've made it through our comprehensive guide to flex cable replacement for tablets! We hope this guide has armed you with the knowledge and confidence to tackle this DIY repair project. Just remember to approach the process with patience, caution, and a sprinkle of humor. And hey, if all else fails, you can always use your tablet as a fancy paperweight. Happy repairing!


Manbutt710 - October 17, 2023
Great guide! I was struggling with a broken flex cable on my tablet and this article really helped me out. Saved me from spending a fortune on repairs. Thanks!
lawnbowling - October 16, 2023
Great guide! Needed to replace my tablet's flex cable and this article really helped me out. Thanks!
fairy_tell - October 15, 2023
Great guide thx for sharin! I tried replacin my tablet's flex cable using ur steps but the result wasnt satisfctry. It waznt clear enuf abt which tools 2 use & how 2 handle the cables properly. Ended up damaging it even more. Disappointing! 😡
Terry-Ruggles - October 14, 2023
Great guide! I've been looking for a comprehensive tutorial like this for ages. Thanks for sharing!
Mammoth - October 13, 2023
OMG! This guide is a lifesaver. I had no idea how to fix my tablet's flex cable, but now I feel like a pro. Thank you so much for sharing this!